

10 Simple Solutions to Stop Terrarium Mould
Ultimately, there are 5 main ways to combat terrarium mould:
- Use clean materials/elements in your ecosystem.
- Include materials like Sphagnum moss and activated charcoal, which will help prevent mould build-up.
- Introduce a colony of mesofauna to create a fully bioactive ecosystem
- Do not overwater your terrarium
- Treat mould outbreaks with hydrogen peroxide
But let's not get ahead of ourselves.
We must make like a fungi and break this down.
Quick Read:
- What is Mould?
- Is Mould Always Bad?
- Why is My Terrarium Mouldy?
- Preventative Measures
- Sterilise Your Glassware
- Boil Your Gravel
- Use Activated Charcoal
- Include Sphagnum Moss
- Bake Your Soil
- Choose Your Sources Wisely
- Remove Existing Mould
1 | What is Mould, and Why is it Growing in My Terrarium?
Mould is a fungal formation of multicellular strands called hyphae.
If the conditions are correct, these strands combine together to form a large and visible colony – known as a mycelium.
These colonies develop on dead or dying organic matter and thrive in warm, moist environments.
Given the often humid and always organic nature of a closed terrarium; it’s probably starting to make sense why mould is such a prevalent issue for botanical builders such as yourself.
It’s important to note that not all fungal development is bad for your ecosystem.
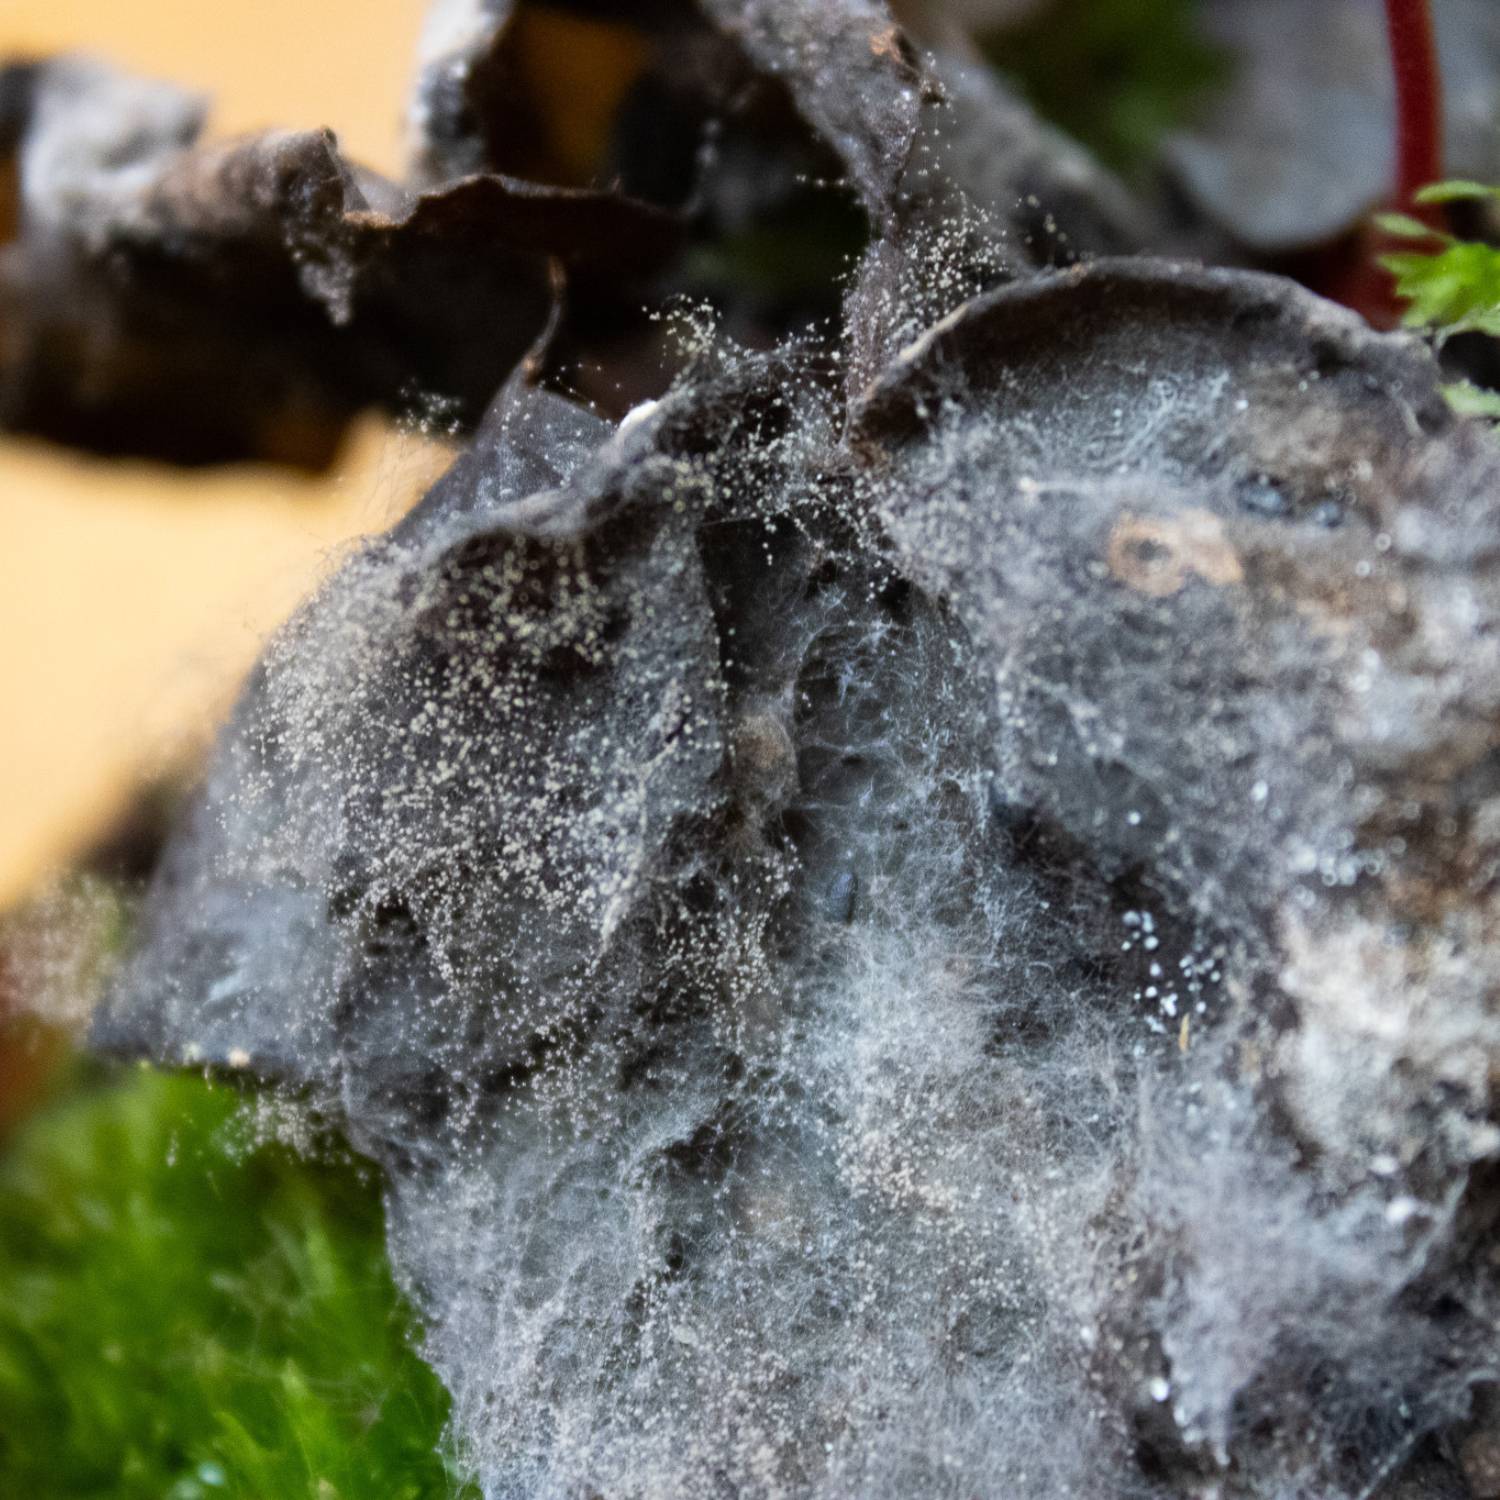
Slime mould growing on the inside of a terrarium container.
2 | Is Mould Always Bad?
Fungi play an incredibly vital role on planet Earth; breaking down organic matter to help plants develop properly.
Though, if left unchecked in a sealed system, certain moulds can become overwhelming.
So don't grab a flamethrower at the mere hint of something off-colour.
First, let's assess whether or not it's really a problem.
3 | Why is My Terrarium Mouldy?
If you’ve already got mycelium in your terrarium you may be able to determine its origin depending on the physical growth.
Inconveniently though, the microscopic spores the fungi use to reproduce can lay dormant on any number of terrarium elements; be it the drainage layers, substrate, decoration, moss or the plants themselves.
As a general rule, you'll be looking at one or more of three issues:
- Your terrarium includes unclean/contaminated elements.
- Your terrarium is overwatered.
- You've incorporate wood without the use of mesofauna/microfauna.
But don’t fret, I’m going to do my best to cover every base for you.
There’s never going to be a 100% failsafe against unwanted mould, but since I have implemented these tactics I rarely experience any issues.
Let's first take a look at what you can do to prevent mould from overwhelming your ecosystem in the first place.
4 | Preventative Measures
1. Sterilise Your Glassware
It’s the same as if you were going to make your own hot sauce or jam, do not assume that your glassware is pristine clean no matter where you’ve got it from.
Residual bacteria or fungal spores can reside within your vessels - so it’s important to clean them first.
There are two ways of doing this, and which method you choose really depends on the glassware you’re handling.
The Ol' Rinse'n'wipe
- Hot soapy water + a sponge. Grab some rubber gloves and get scrubbing.
- Make sure you wipe down the inside and out.
- If you’ve got an awkwardly shaped vessel that’s hard to scrub; try letting the hot water sit inside the terrarium for 10 minutes, then rinse it out until all the bubbles have disappeared.
Deep Heat
- Whack on the oven to around 275 F / 130 C. If you have a sturdy, thick glassed container (think mason jars or demijohns) sticking it in the oven is the most effective way to sterilise your glassware.
- The high heat will eradicate any unwanted inhabitants.
Pro Tips:
- You want the vessel to heat for at least 30 minutes
- Use oven gloves when removing the vessel from the oven
- If you’re sterilising multiple containers at once, do not let them touch each other
- Only put the glass elements of your vessel inside the oven
- Do not rinse hot glass with cold water!
I will put a cheeky plug in for the glassware available on our shop, it's as clean as can be right out the box so you don't need to worry!
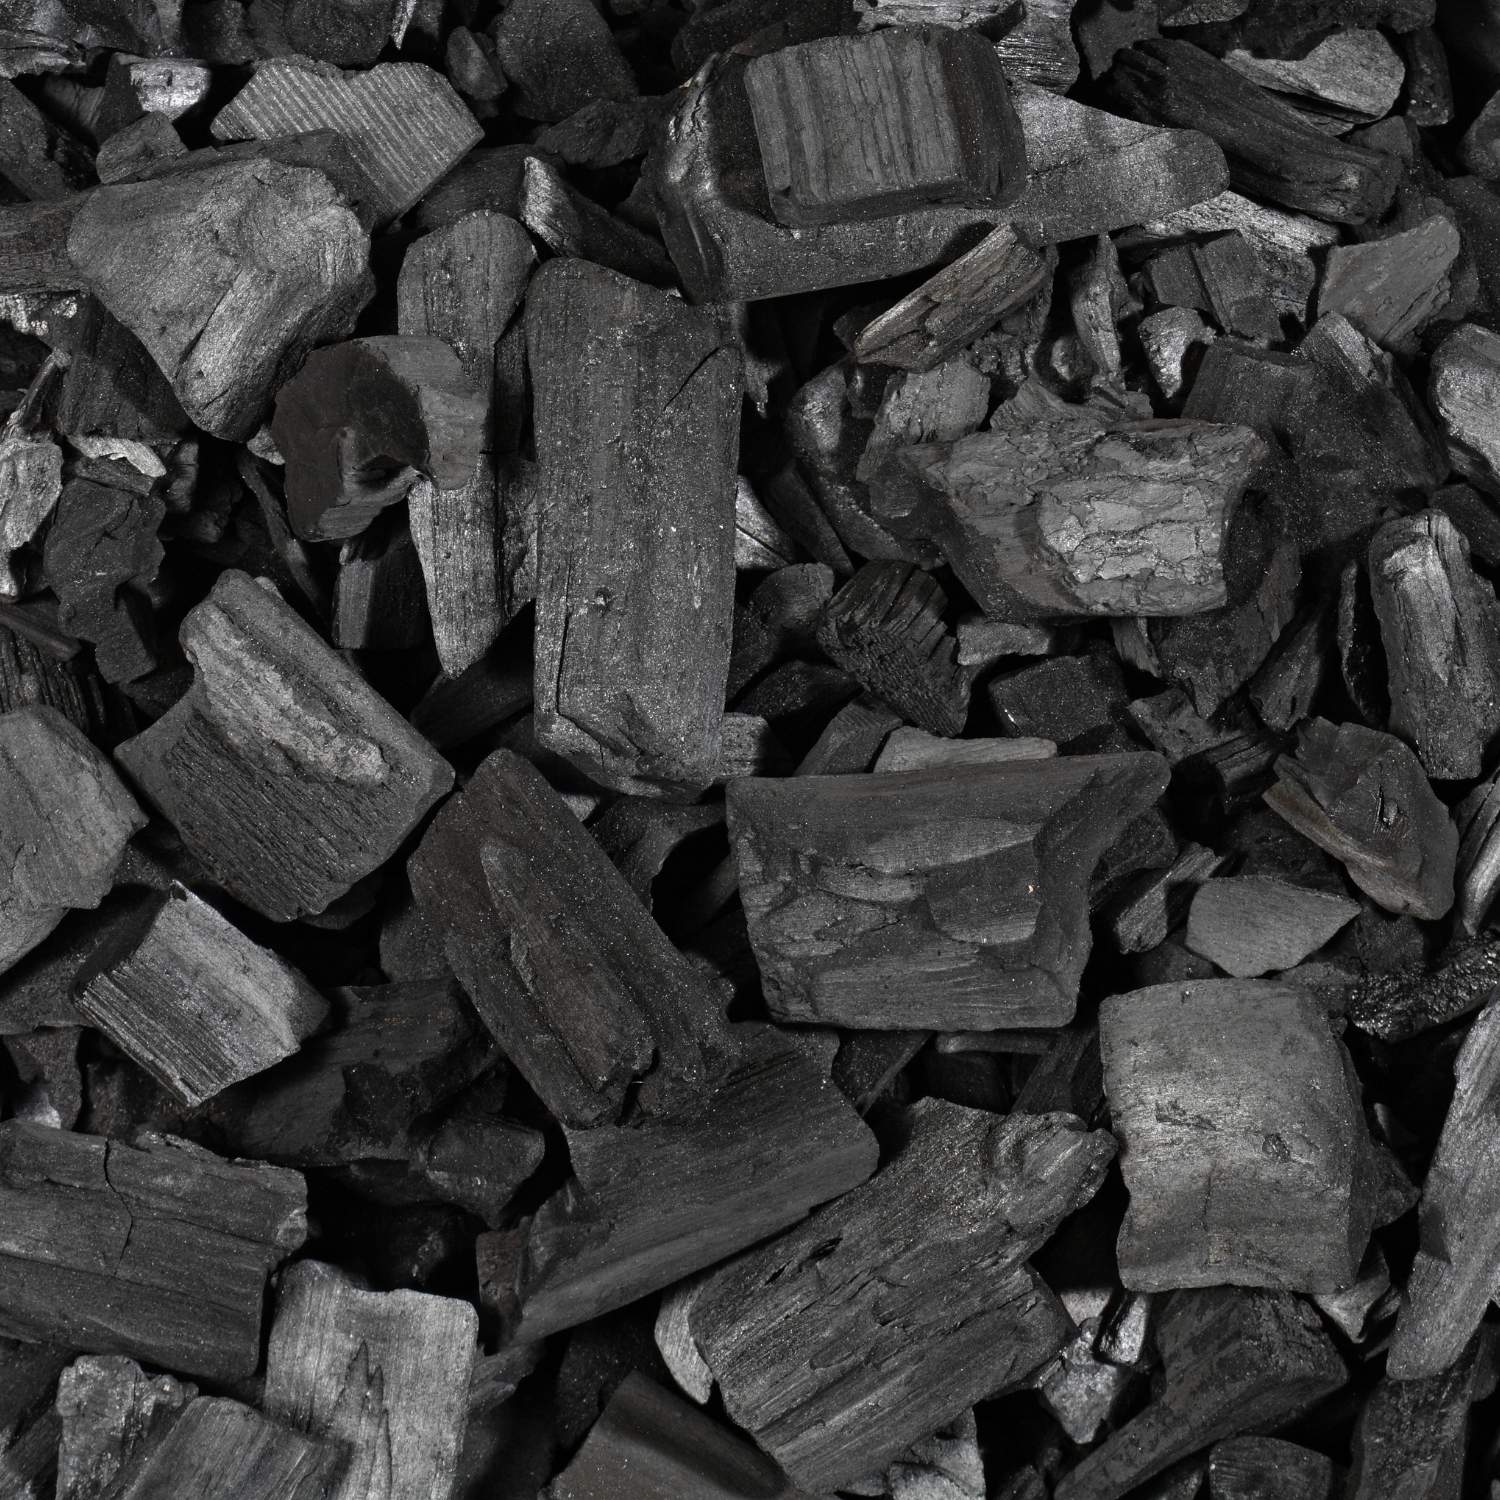
2. Boil Your Gravel
The drainage layer of gravel seems to be one of the more common areas for mould to develop for beginners.
This is usually attributable to using drainage elements you've found out in the wild, or that weren't designed for organic set-ups.
If you're not using pre-sterilised substrates, here's what you can do:
- Grab one of your old shabby pots and pour in all the gravel you need (making multiple terrariums? More gravel!). Pour on some boiling water and heat on the hob. Ensure it’s bubbling but not overflowing
- Leave this to boil for around 15 minutes, then carefully drain out the water into the sink and let the gravel airdry for a few hours.
Just like baking, which is an alternative, the boiling process will eliminate any residual residents.
Tips:
- Some aquarium gravels contain dyes or are coated in a coloured powder, be aware the boiling process may remove this colour.
- If you choose the baking alternative, use the same heat instructions as for your glassware and line a couple layers of foil over the top of the tray holding the gravel
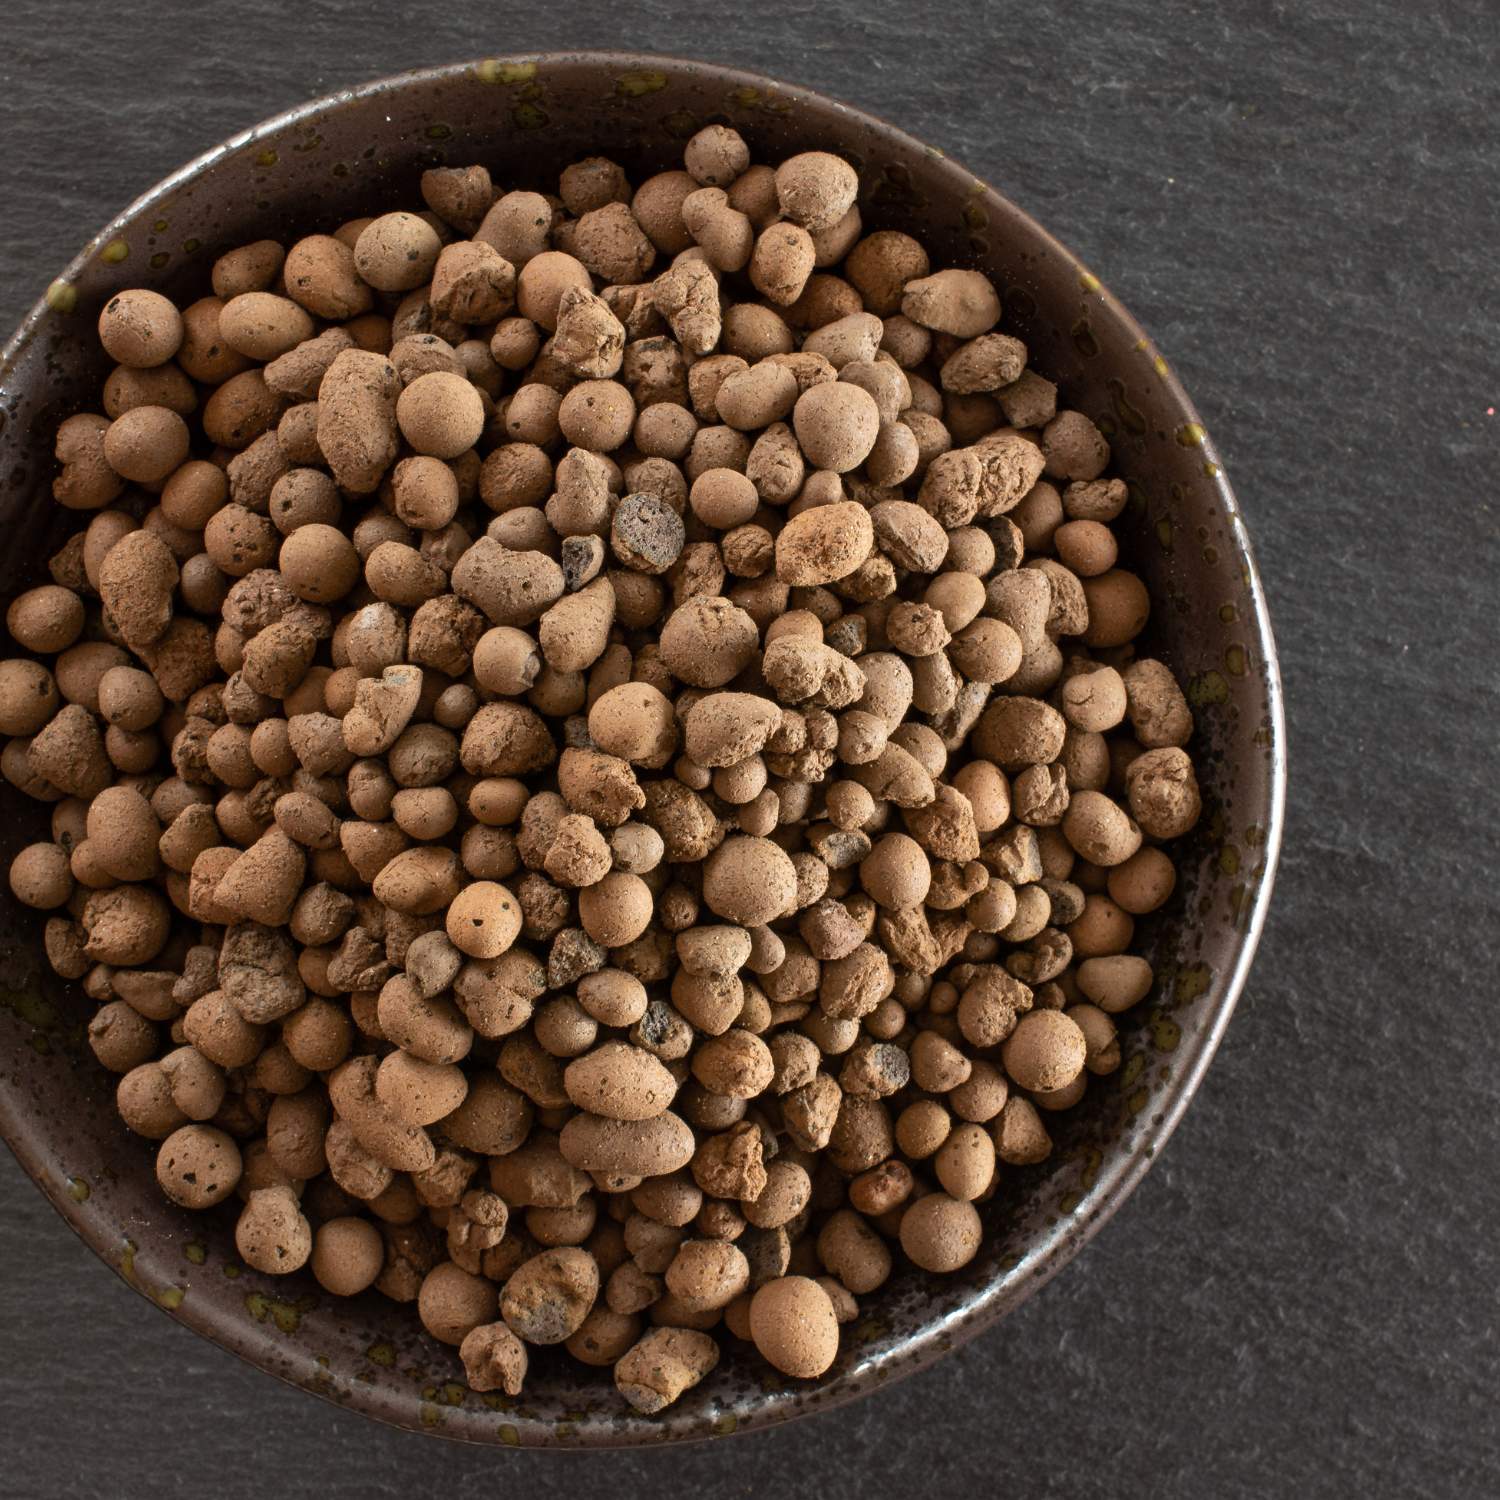
Activated Charcoal isn't an essential terrarium component, but it's highly recommended.
3. Use Activated Charcoal
Harmful chemicals can reside in the soils, substrate and water you hydrate your terrarium with and can damage your plants and your moss.
Over time this can cause your plants to die, and dead organic matter leads to… that’s right: mould.
That’s where activated charcoal (sometimes referred to as activated carbon) comes in.
Activated charcoal is a special, treated version of charcoal that has an incredibly high surface area.
The porous surface works to adsorb toxins and chemicals, thus eliminating bad odours and promoting a healthy ecosystem.
This component comes in many forms and can be added either as an entirely separate layer or mixed into the drainage layer itself.
We have activated charcoal available to order here.
If you're outside the UK, have a look at activated charcoal here.
As an added bonus, use only distilled/rain/reverse osmosis water when hydrating your builds to further reduce the amount of potentially harmful chemicals entering your terrariums.
Tips:
- Regular charcoal still has a high surface area but isn’t quite as impressive as the treated kind.
- If it’s the long term you’re going for, make sure it’s activated
- Activated charcoal is readily available online and in many aquarium shops, but if you’re going to skip this step I would recommend aerating your terrarium more often to allow for negative chemicals to release and dissipate
- Of course, though the surface area is high, the binding capabilities of charcoal are not infinite - BUT, that’s where another ally comes in handy. More on that later
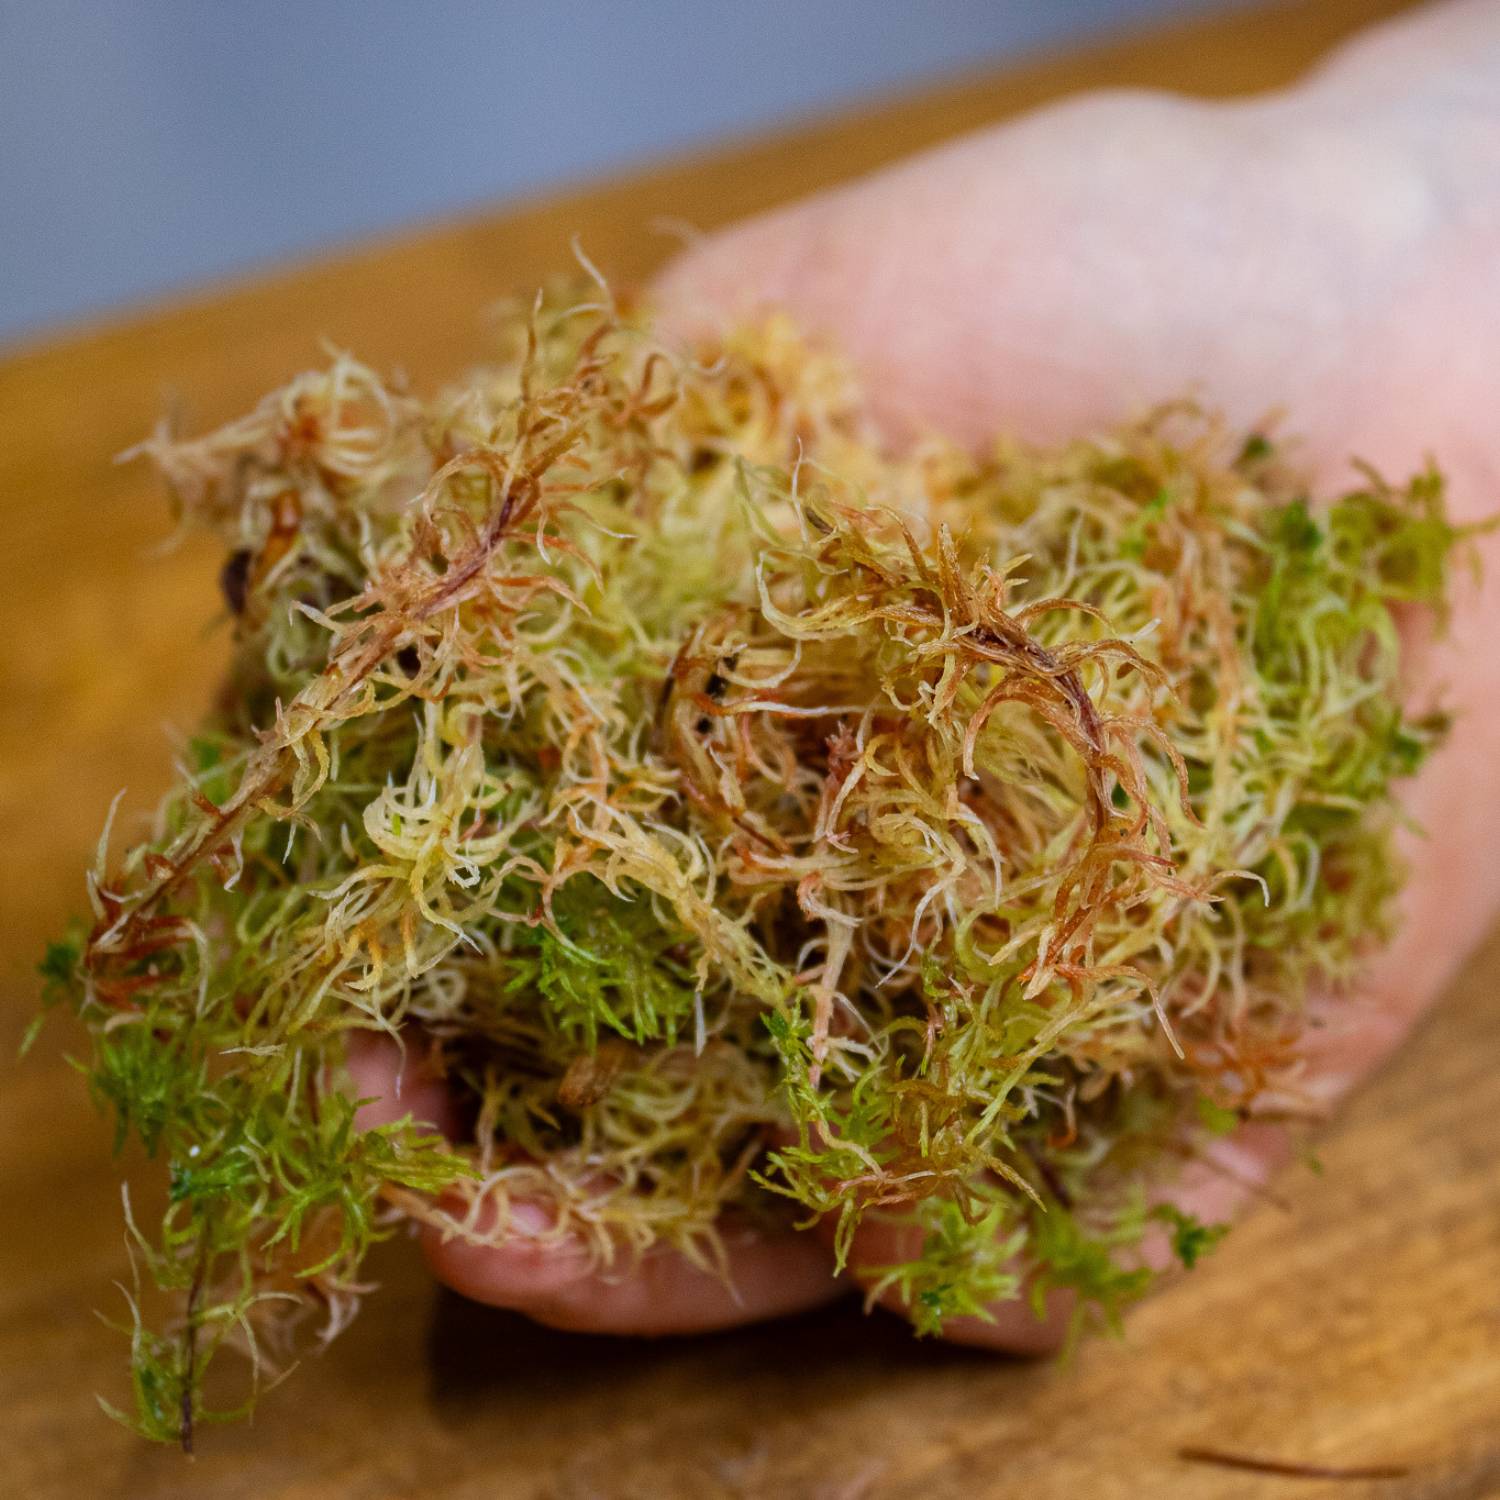
Sphagnum can be combined with your substrate or packed as a layer in-between your drainage and your substrate.
4. Include Sphagnum Moss
Storing moisture allows for root systems to remain hydrated but including sphagnum moss in your terrarium has other hidden benefits.
Due to the phenolic compounds embedded in the moss’s cell walls, the peat formed from sphagnum is slow to decay, and they develop low-PH anaerobic conditions within the soil, reducing microbial formations such as mycelium.
Additionally, drawing excess water away from the substrate layer can assure your plants are not drowning in moisture, protecting them from root rot.
A final benefit to the use of sphagnum is its fluffy nature; extra room for aeration can aid in the balance of humidity, further reducing the opportunity for mould to build up.
Sphagnum, however, is not the most sustainable material as it regenerates in the wild so slowly.
We do have our own Sphagnum moss available to UK shoppers.
You can, however, pick some up here, too!
5. Bake Your Soil
As we work our way through the layers of your terrarium, you’ll realise there’s a little something you can do at every stage.
Each layer serves a function, and your substrate’s provision of nutrition is arguably the most vital for a plant-based closed terrarium.
I found out the hard way that no matter where you get your soil from, there is no guarantee there won’t be dormant spores laying in wait for some water.
Again, this is typically only an issue when using soil taken straight from the outdoors or cheaper stuff bought online.
One way to assure your soil is safe is to sterilise it just as you would a sturdy glass vessel.
Let’s take a look at some of the best ways to de-fungi your substrate layer.
- In the oven: Probably the most conventional way to clean your soil, baking is quick and easy to do for significant quantities of the brown stuff.
- Crank your oven up to 180-200F / 82-83 C, lay your soil in an oven-proof dish and cover with a layer of foil. Leave to bake for 30 minutes, then remove and allow cooling.
- Don’t allow the temperature to exceed the recommendation as any higher could produce toxins, and we don’t want that.
- In the microwave: When dealing with smaller amounts of soil the microwave is another easy option.
- Make sure to use microwave-safe containers (NO FOIL!) with some room for aeration. For every 0.45kg (1 pound) of soil, heat it up for 45 seconds. Again, leave to cool until use.
Tips:
- There is also an option to steam your soil in a pressure cooker, but if the substrate mix is high in nitrates there’s a chance of combustion. Therefore, I will NOT be recommending this method
- Depending on your substrate you MUST research your substrate type and its needs before baking.
- Aquarium soil, for example, does not need to be sterilised.

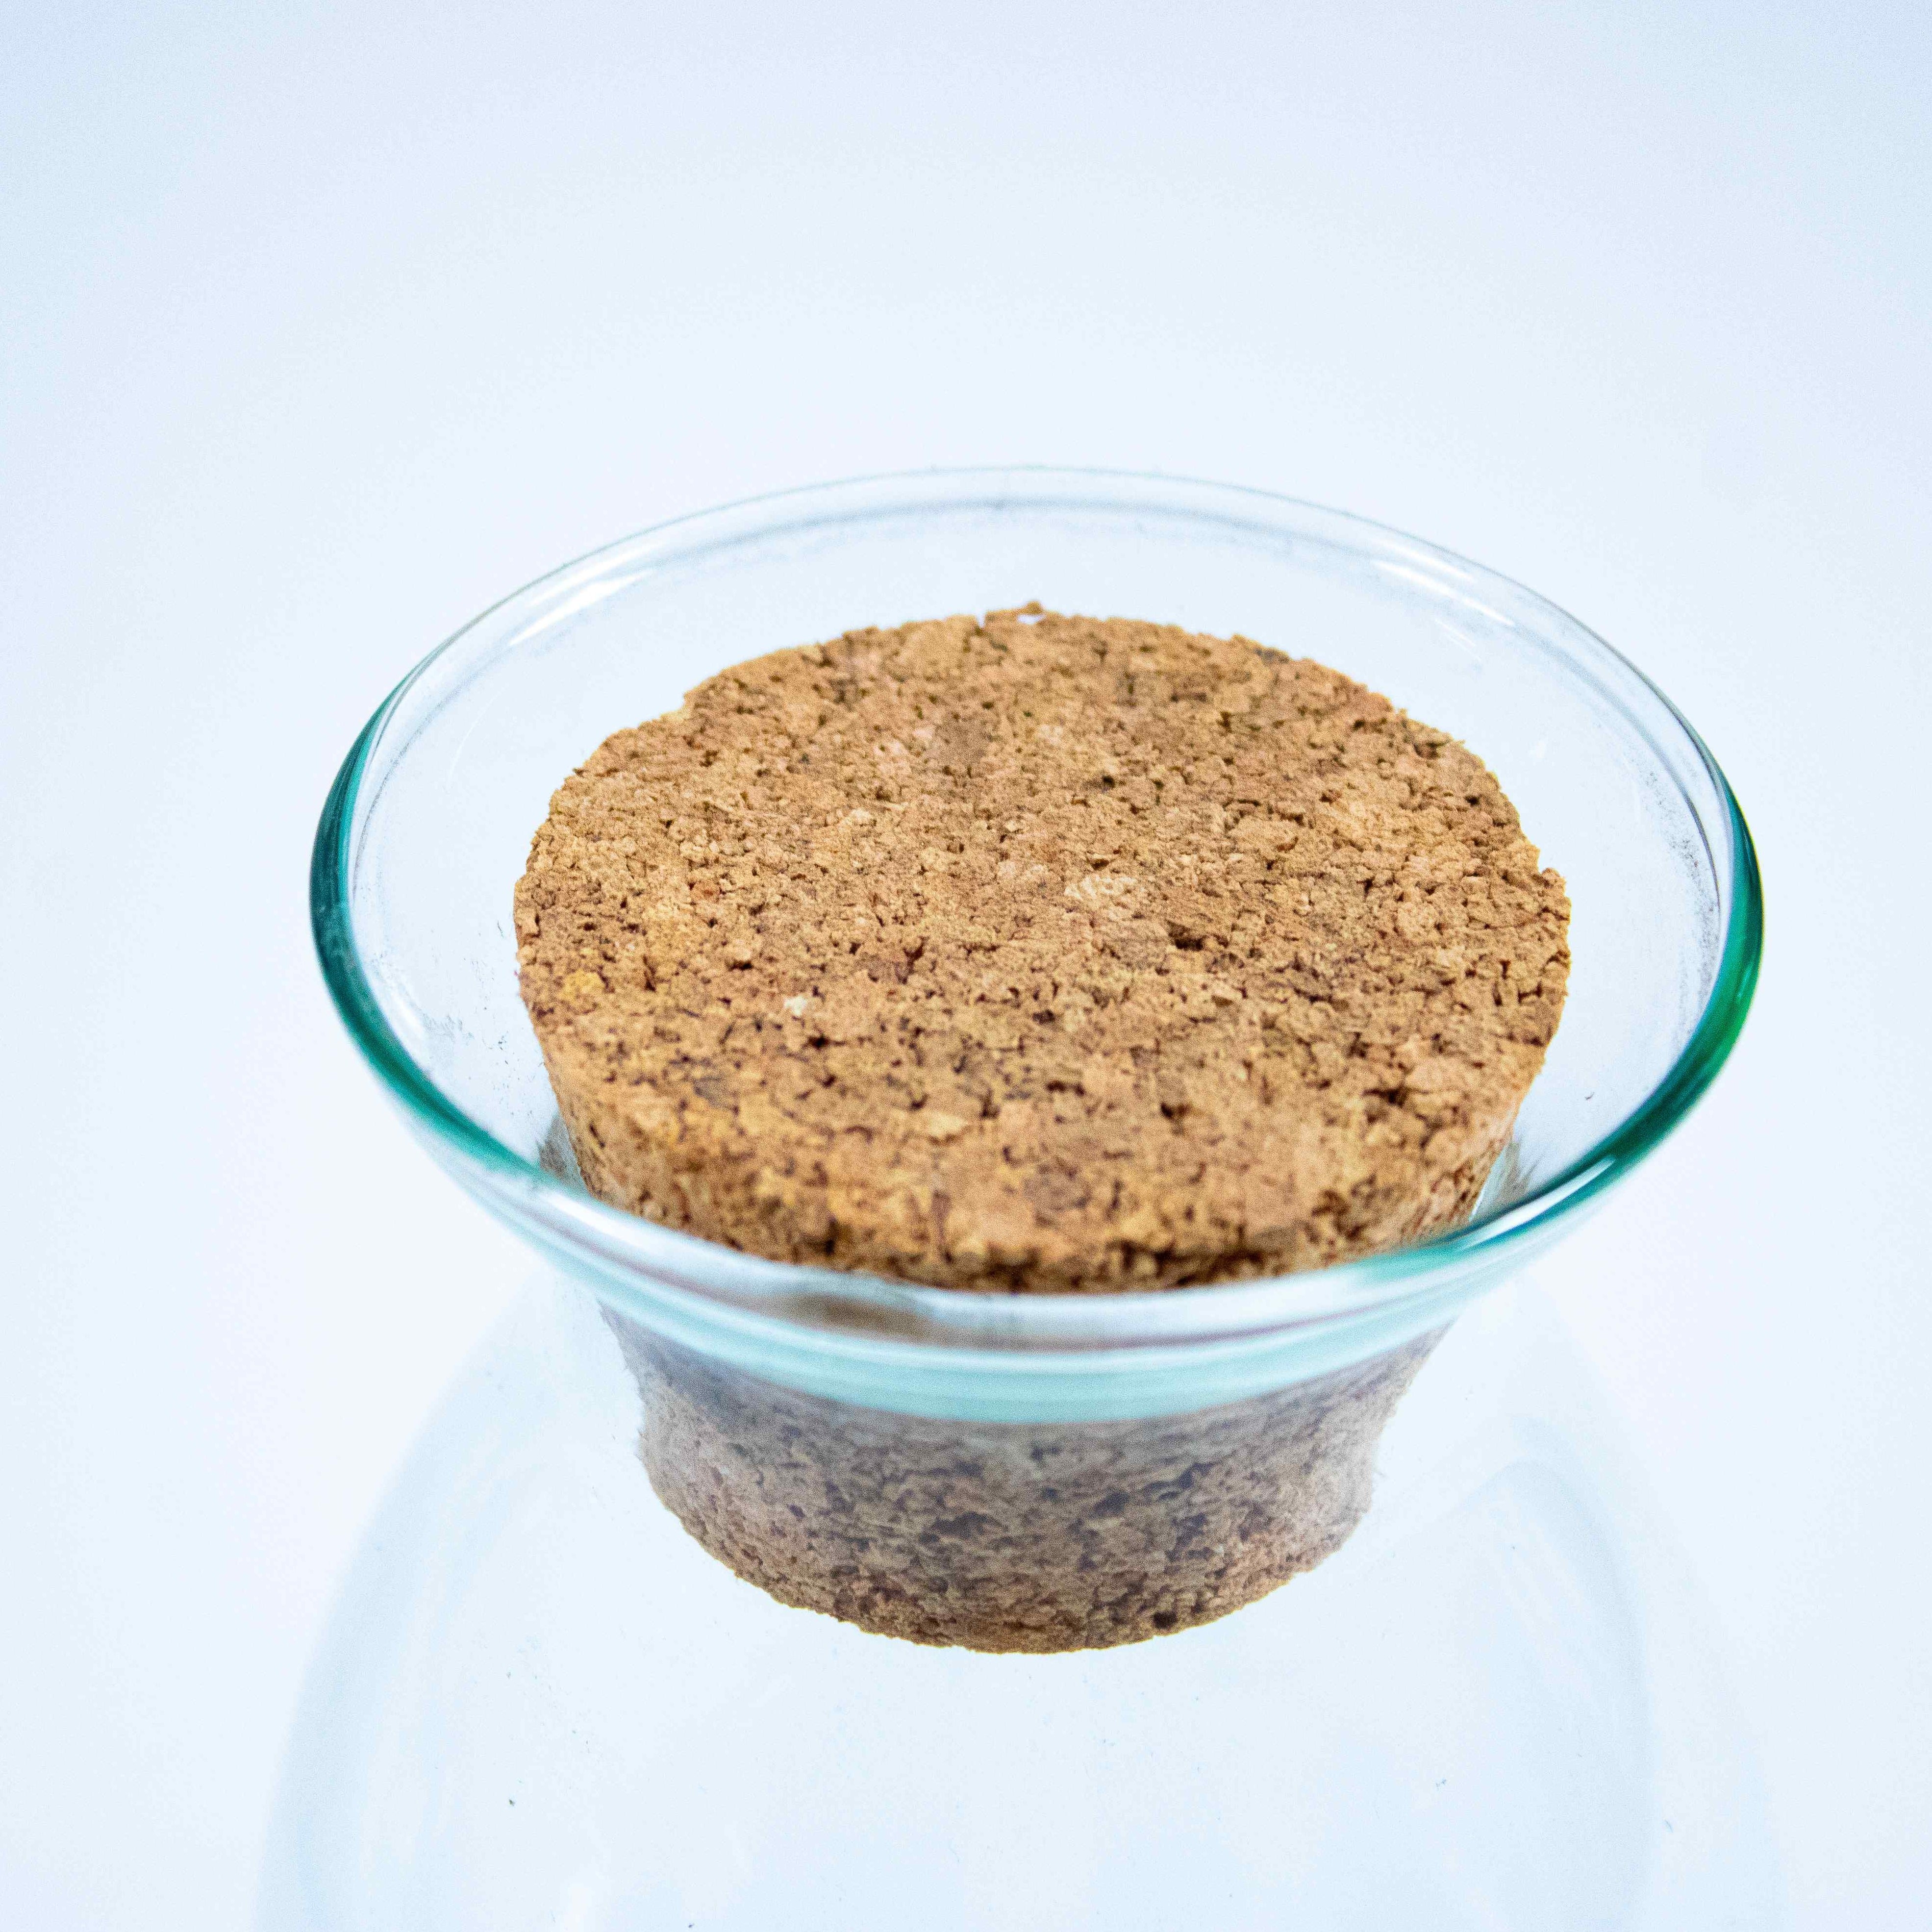
Foraged moss can pose a lot of problems. Try our live moss bundle!
6. Choose Your Sources Wisely
As mentioned prior, fungal spores can hitch a ride on your plants and moss.
But, this isn’t the only reason to be careful about where you pick your plants and moss - if you’re foraging yourself.
There’s nothing more satisfying in terrarium creation than building an ecosystem made entirely from materials you’ve foraged locally yourself.
You do however have to take extra steps to ensure you aren’t jeopardising the future of your mini-world.
As well as potential bacteria, unwanted bugs can eat your roots and cause rapid decay.
Foraging your own materials is arguably the most significant cause of an unhealthy terrarium next to overwatering.
Here are some questions to ask yourself while you’re out on the hunt for flora:
Where am I picking my moss?
Are you looking at pavements on the side of the road or at clusters a the base of trees?
You may need to rethink your strategy.
Consider how many feet may have walked over that moss, and how many animals may have urinated on it.
You want your samples to be as fresh as possible, so pick stuff above waste-level, generally.
Do I need to wash my moss?
It’s hard to ever guarantee your specimens will be spore and spawn free, but here's a tip to help:
Should I submerge my moss?
If there are any unwanted critters they’ll likely abandon ship if submerged in water, you can then gently escort them out of the window.
Are these specimens healthy?
Not everything you see growing out in the wild is necessarily going to be in the best condition.
Ensure you’re taking a careful look at the state of the plants/mosses you’re using before you put them inside your terrariums.
If they’re already on their way out and they die inside your vessel that’s simply more food for fungi.
If you'd like to play it safe and order your moss in, we have some available in our shop.
If you're outside the UK, shop for moss here.
5 | Removing Existing Mould
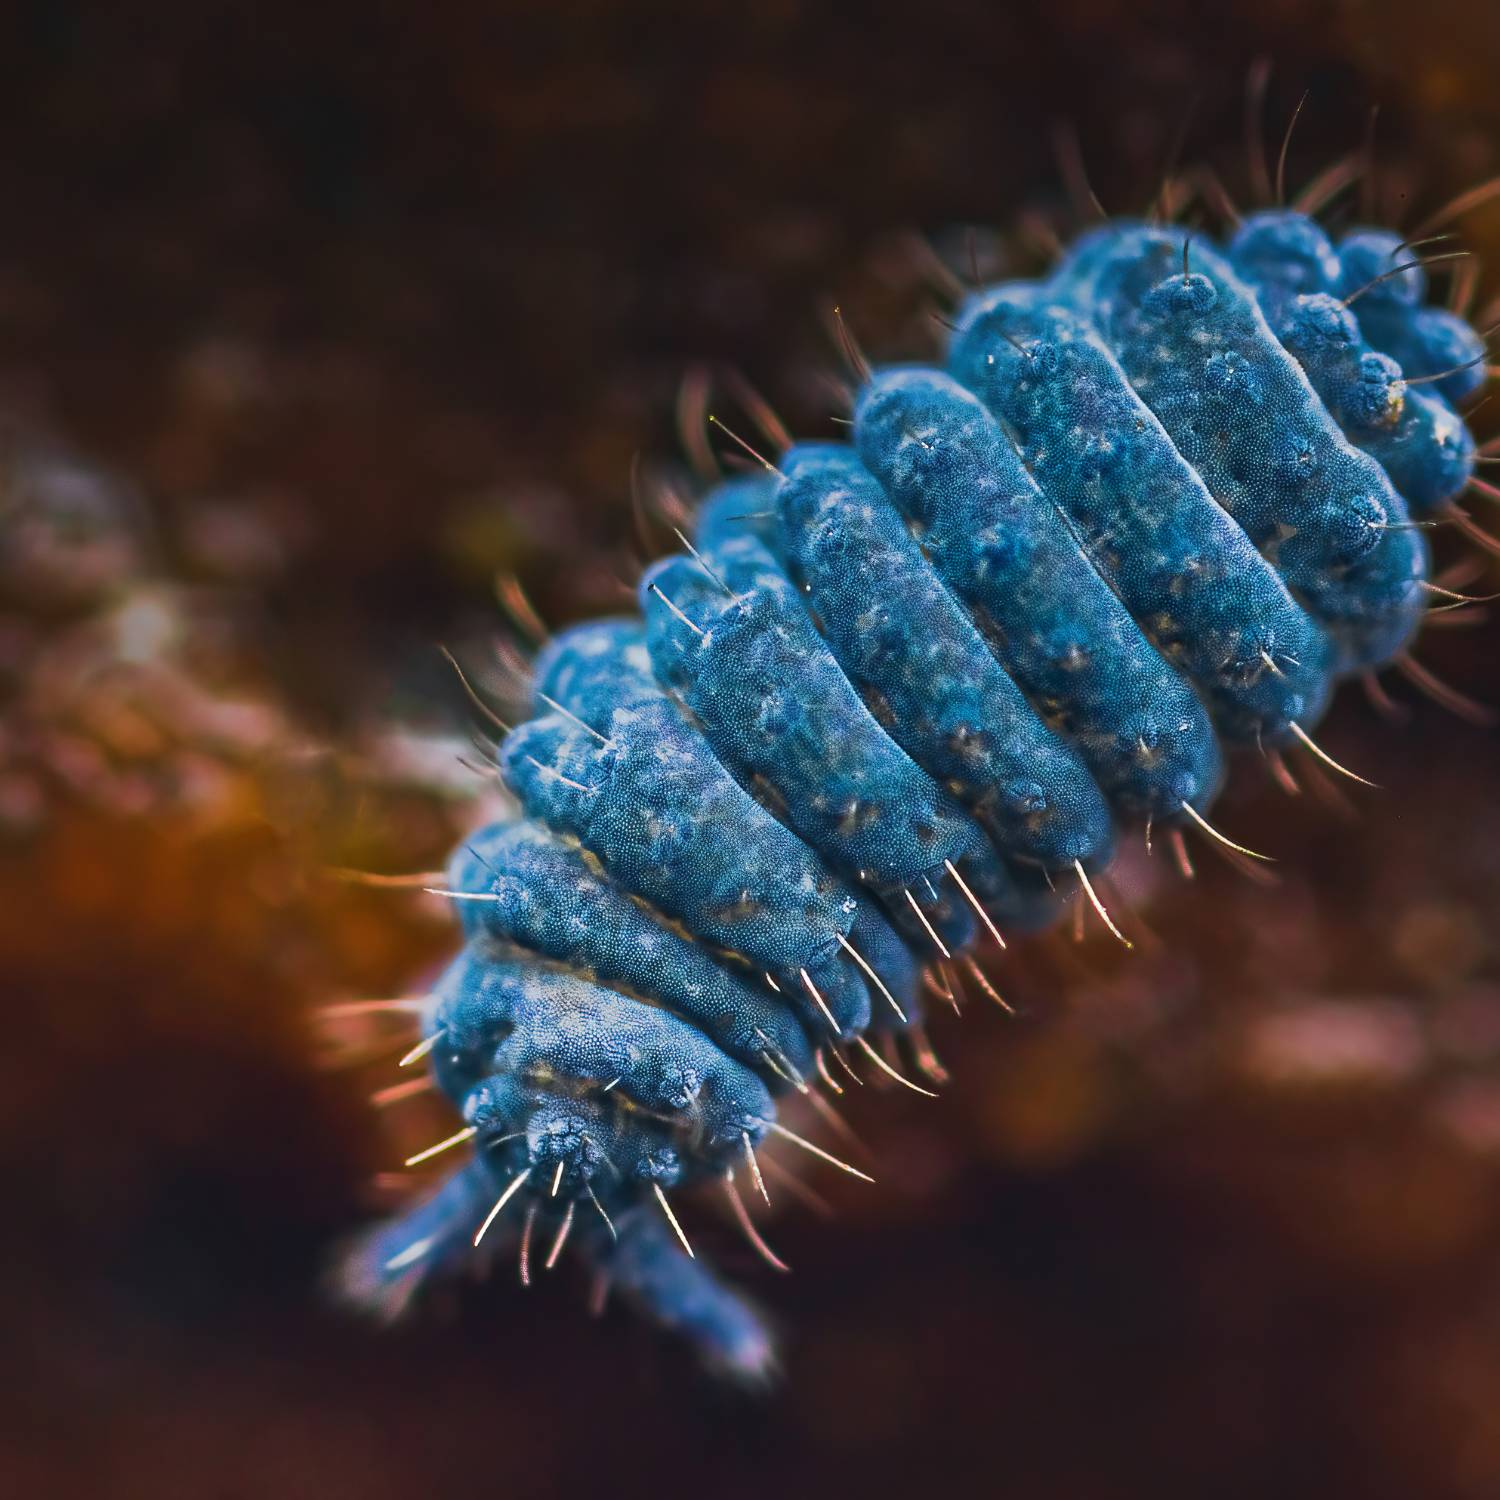
Mesofauna such as Springtails are the ideal mould combatant. Plus they're kinda cute.
1. Bring in the Cleanup Crew
If it’s true longevity you’re after, bringing in some custodial critters is the wisest solution.
Springtails are essential if you have incorporated wood inside your terrarium. Wood will mould and you need something to take care of that.
I've written a lot about them.
This is not only a solution to remove mould, but one to ensure a healthy and truly self-sustaining ecosystem.
Admittedly not every terrarium enthusiast is going to be big on bugs – understandable, but if you can try and frame these workers as friends rather than foe, it might help to make you a little more comfortable with the idea.
Below we’ll list some of the most popular and readily available options, all of which feed on decaying organic matter – keeping your eco-system healthy for years to come.
Springtails
Arguably the most popular choice, springtails are tiny little bugs that breed efficiently and do an exceptional job of keeping your terrarium clean by helping break down organic matter that could lead to microbial growth.
Readily feeding on mould, they can also serve as a healthy dietary supplement for reptiles and amphibians and even fish – if you’re creating vivariums and/or aquariums, that is.
Their tiny size is an added benefit to those who would rather forget they have bugs inside their vessels.
You can order in some springtails here:
US: shop springtails
UK: shop springtails
Dwarf White Isopods
Another excellent option, isopods of all types are comfortable in warm, humid environments and will also feed on mould like there’s no tomorrow.
There is a humungous array of isopods available online, each species sporting different colours and patterns.
Earthworms
A larger option, earthworms add a secondary benefit in addition to feeding on decaying matter; they aerate your soil as they burrow.
If you’ve got fair space to house them they can do an excellent two-fold job. Additionally, they serve as a great source of food for reptiles and amphibians that prefer soft, moist grub.
Tips:
- To keep your cultures healthy and encourage breeding, you can feed them with sterilised leaf litter.
- If you’re foraging from the forests, make sure to microwave the leaves briefly first.
2. Hydrogen Peroxide
If your terrarium is already up and running, showing signs of mould development and you need a quick fix (sans the bugs), look no further.
The effervescence of hydrogen peroxide captures and kills mould.
And, application is easy:
Simply dip a cotton bud (Q-tip) into a 3% solution of hydrogen peroxide, the most commonly available solution online, and go to work on affected areas of your terrarium.
It can be tricky if you’ve got a widespread outbreak, so use this technique when you have to target visible surface level developments.
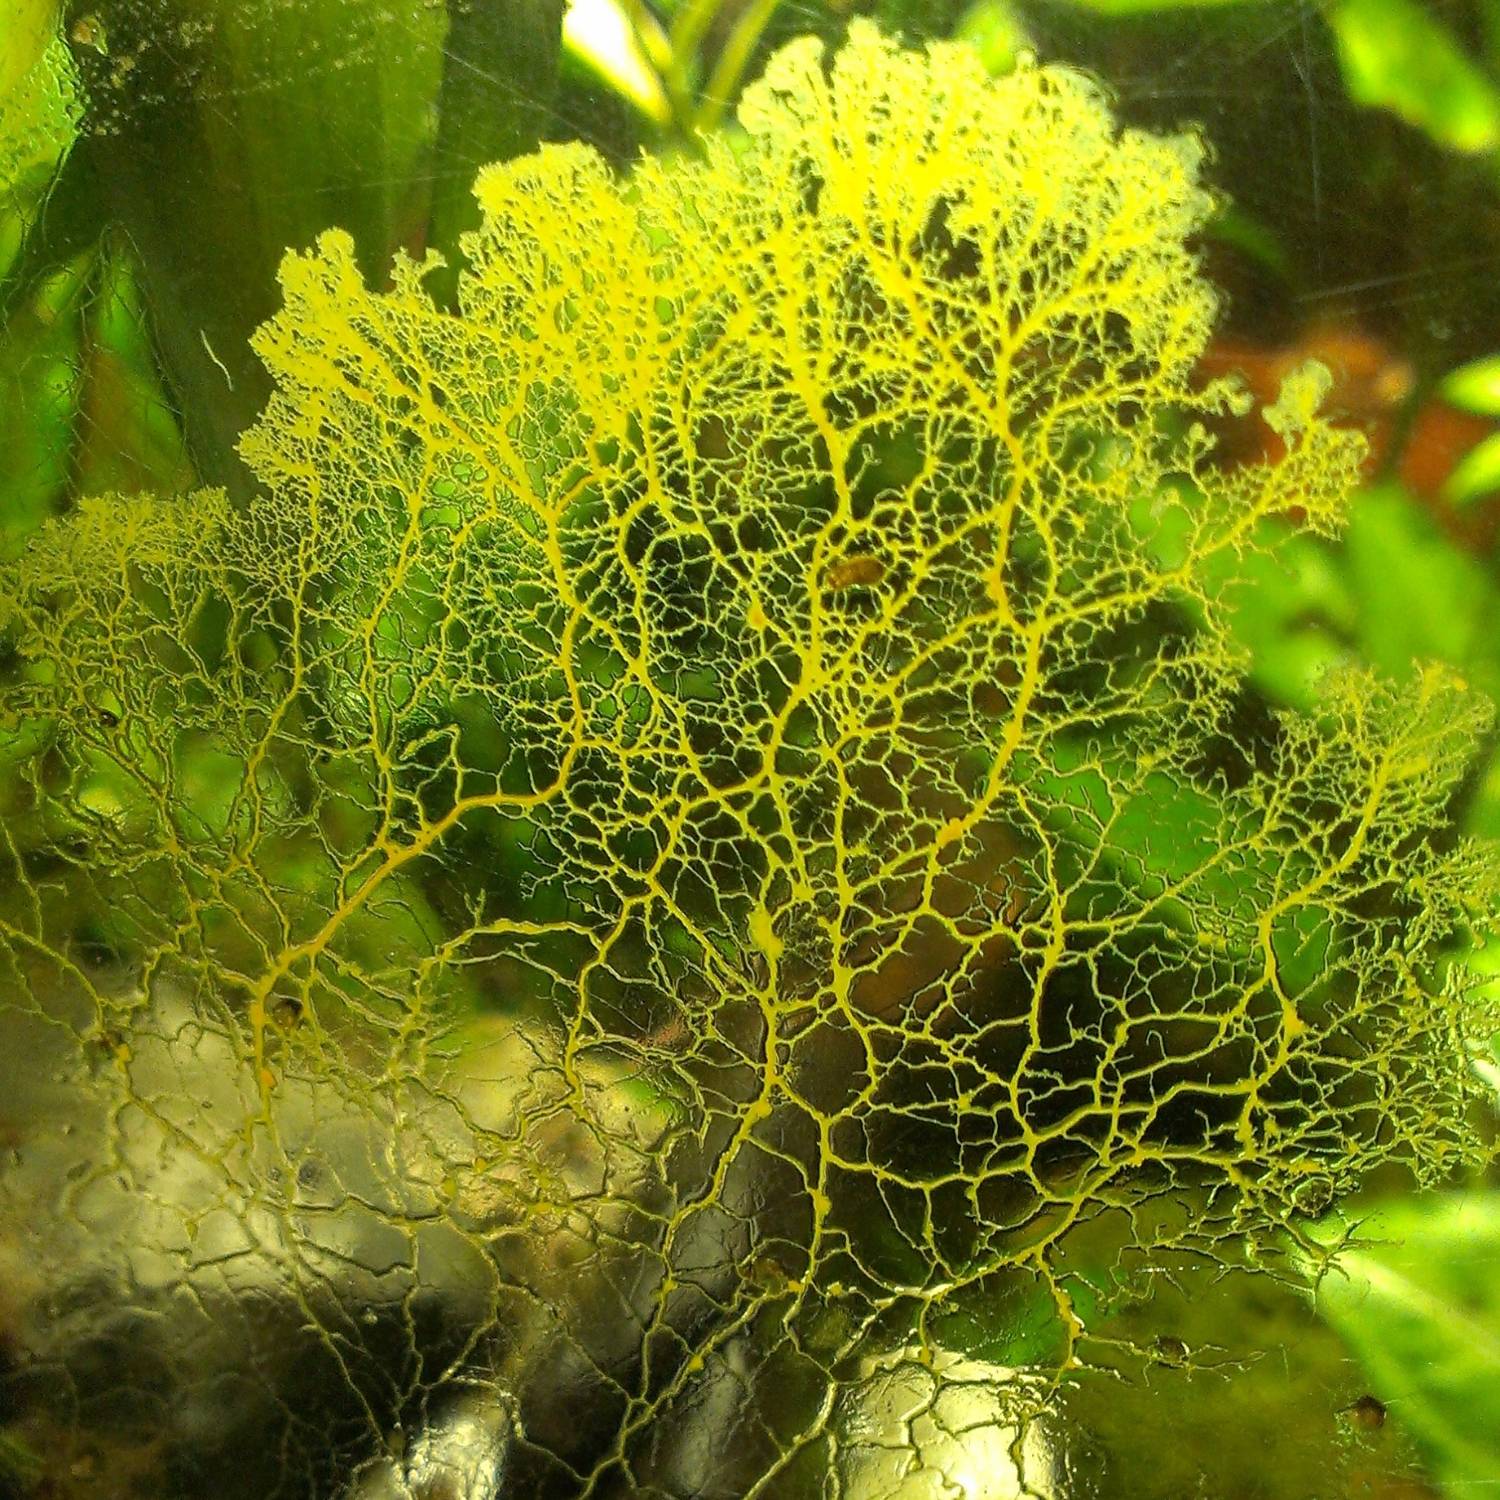
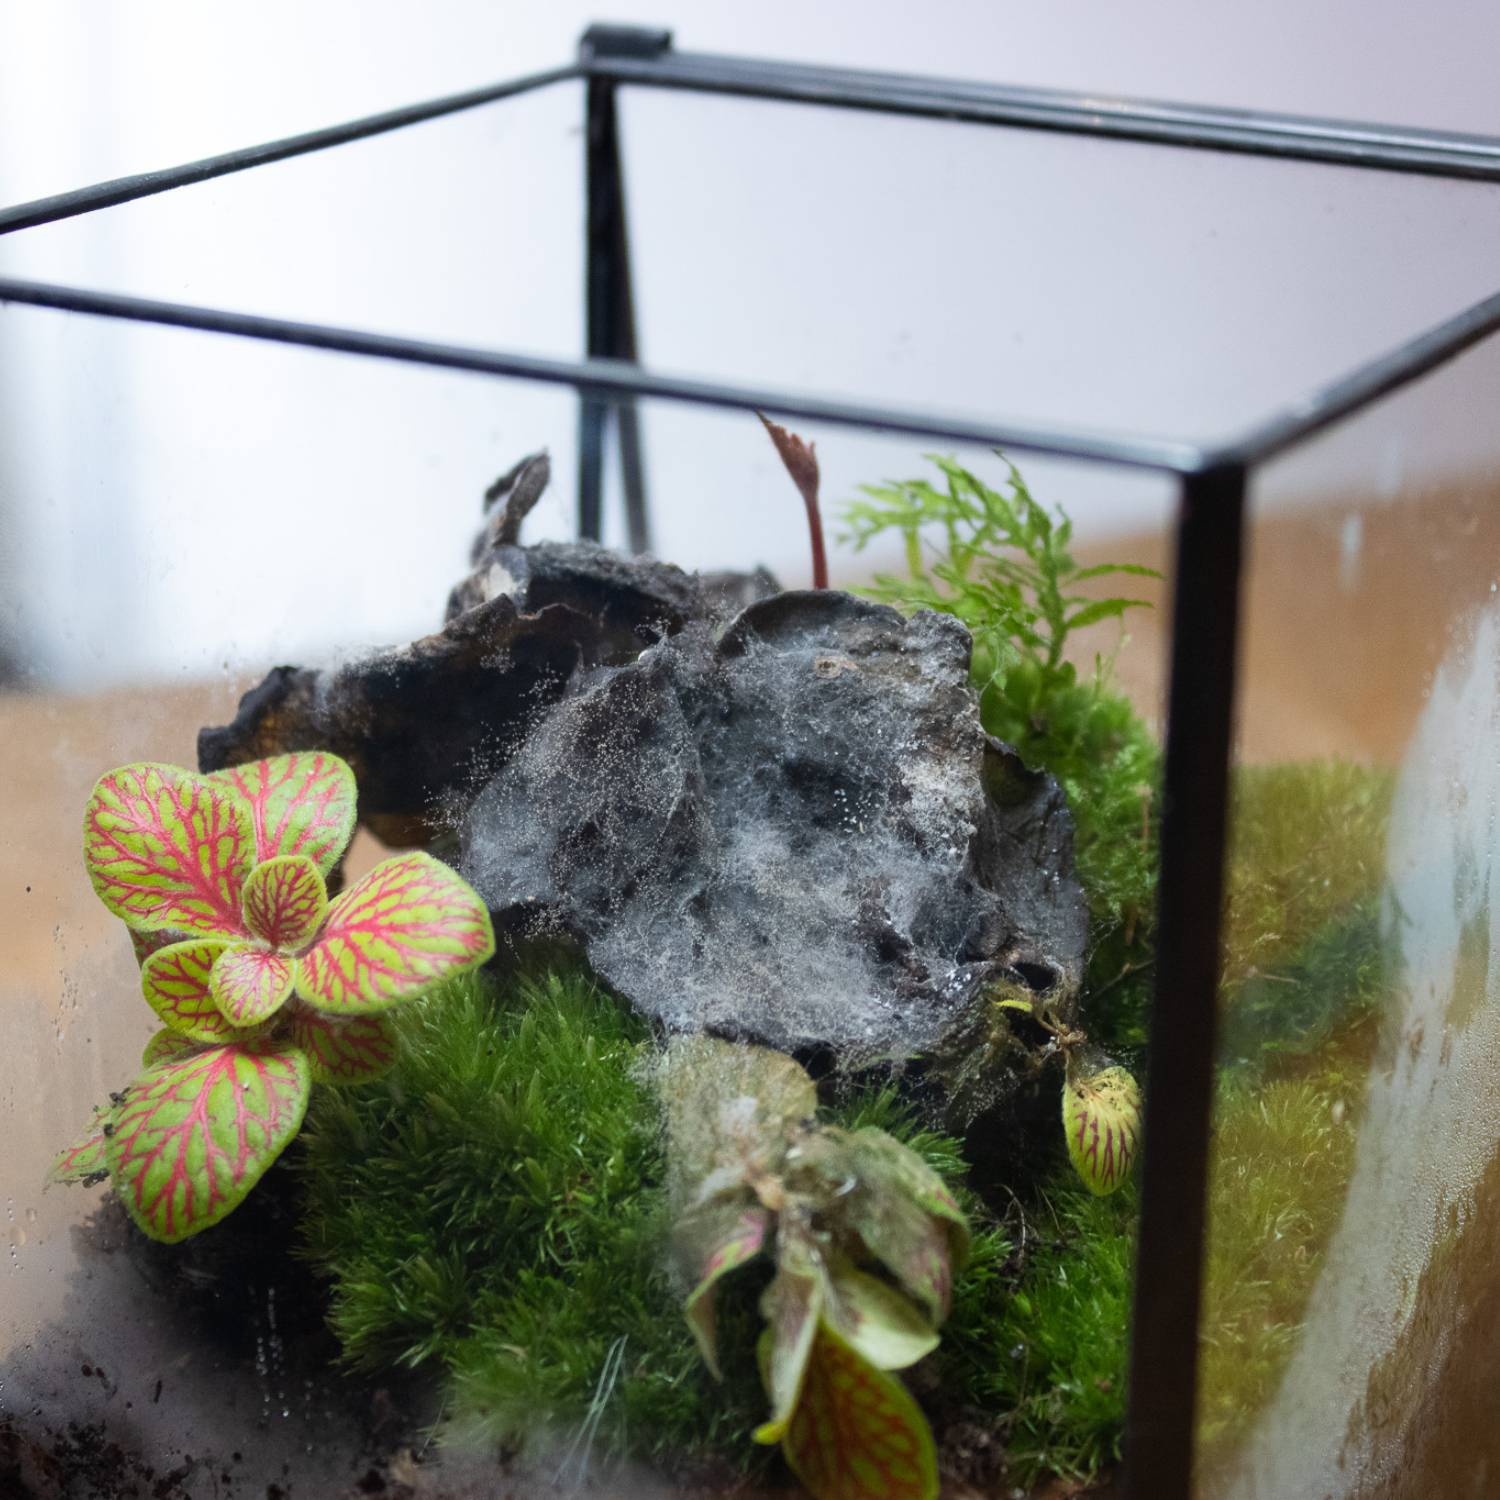
Quite often the use of wood or stone inside a close terrarium will promote the growth of mycelium.
If not boiling, you can try mixing the peroxide solution with water (roughly 1 part peroxide to every 32 parts water) and soaking any of your décors for roughly 1 hour inside the mix (in a separate container, of course).
Although already diluted you do want to be careful with how much peroxide you place inside your terrarium.
It shouldn’t harm your plants, but by no means go pouring a whole bottle in there – that ain’t right.
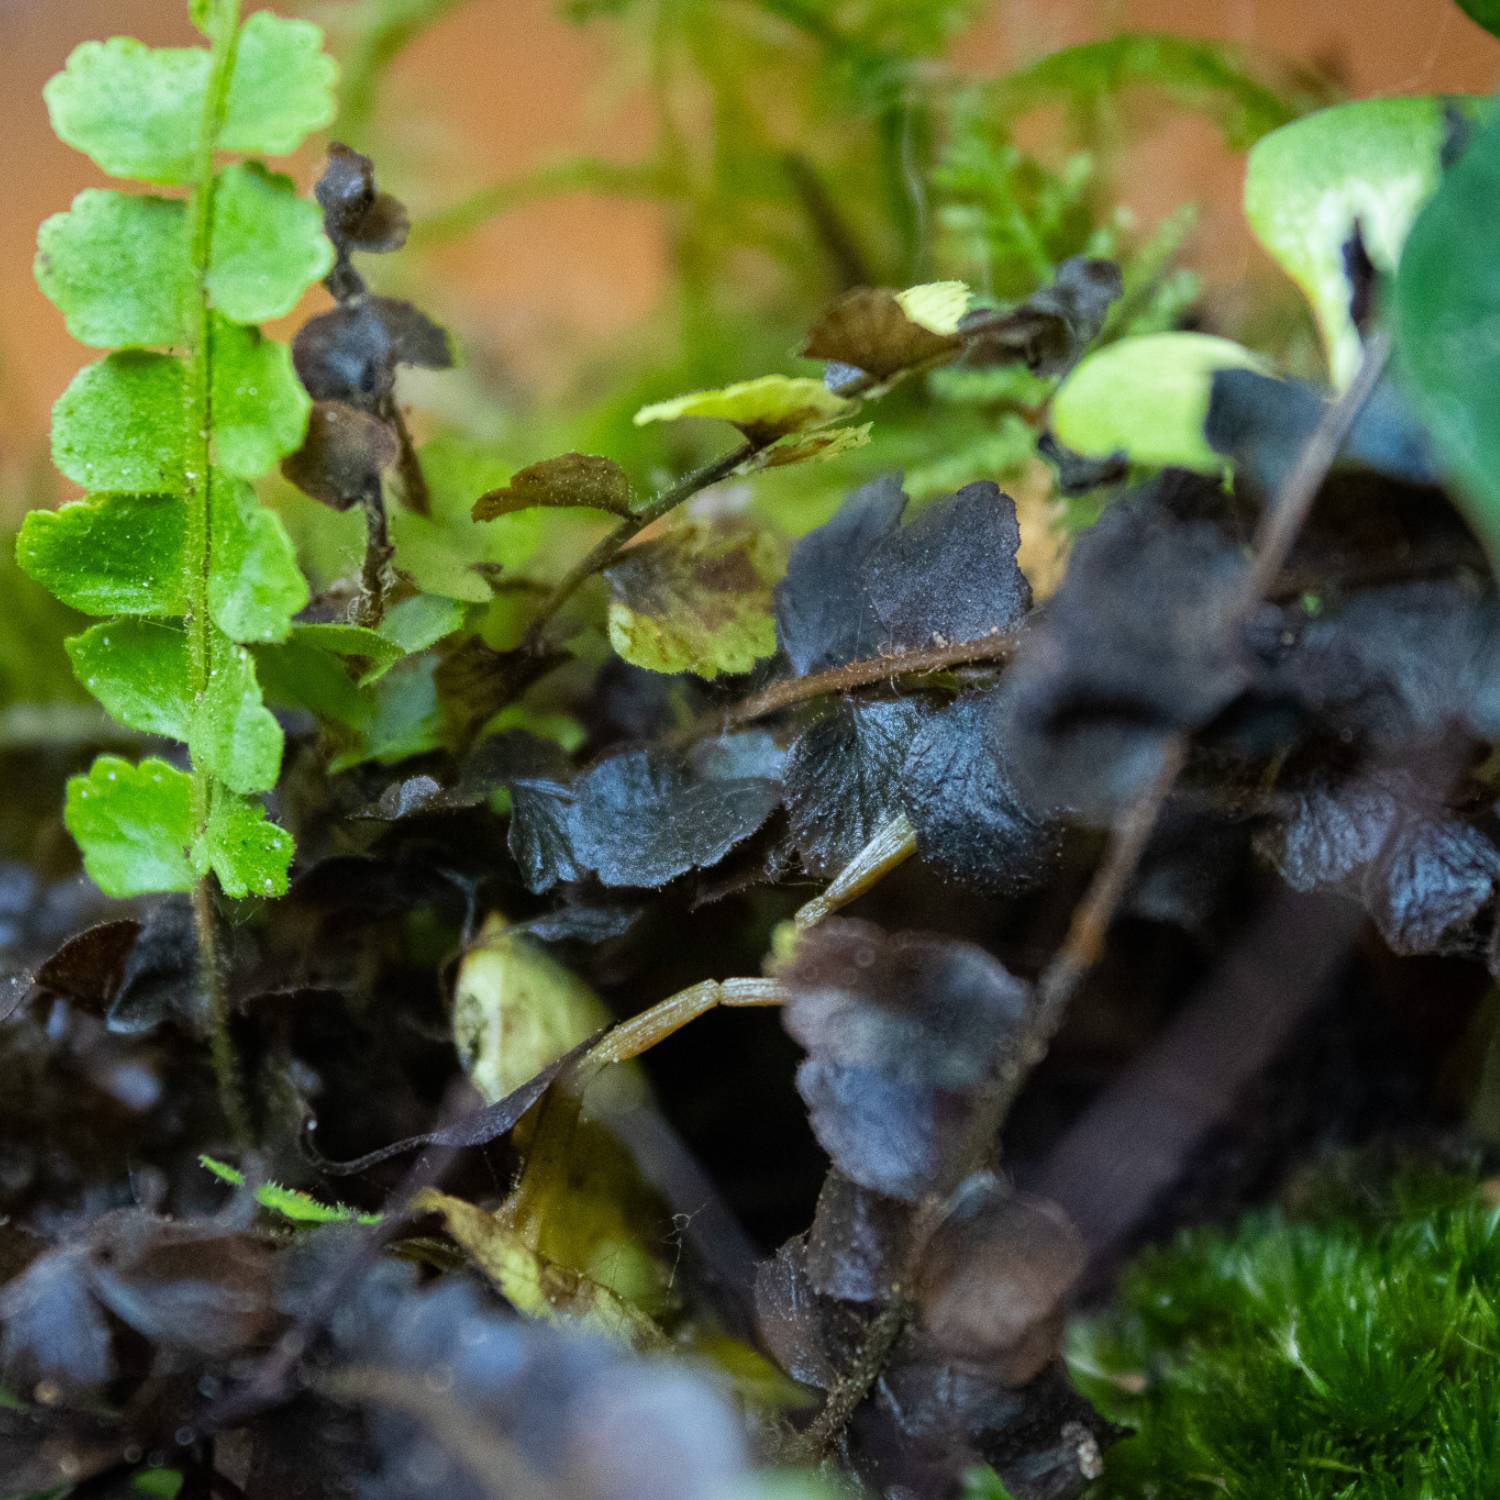
Blackened leaves are a sign your terrarium may have been overwatered.
3. Watch the Watering
It’s decidedly smarter to err on the side of caution when watering a closed terrarium
As you’ve probably gleaned by now, mould loves company.
No, wait, that’s misery.
Mould loves water.
Managing the levels of water inside your terrarium can be a hard balance to strike.
On the one hand, you want longevity and to ensure there’s enough water in there to cycle through and hydrate your plants and moss.
On the other hand, too much water can cause the roots of plants to rot, decay, and grow colonies of the fuzzy stuff.
How can you ensure you’re watering your terrarium the correct amount?
First of all, research your plants.
It’s important to combine flora that shares similar likes and dislikes. Trying to keep a succulent alive next to a fern, next to moss is probably not going to go down so well.
You know that friend who you really don’t want to meet your other friend?
Think of it that way.
Check out our top 13 terrarium plant recommendations
A good rule of thumb for closed terrariums is to first wash and hydrate your mosses and plants in clean, distilled water (remember this tip from earlier?!) and to ensure your substrate is nicely moist but that there is not a pool of water sitting constantly in your drainage layer.
Finally, once the terrarium is complete, give the top layer a mist to ensure moss is kept humid from the get-go.
If you’ve already over-watered your terrarium, don’t fret, there’s a solution – as always.
4. Aerate Your Ecosystem
Excessive levels of moisture and subsequent humidity can be a big problem for a closed terrarium.
With nowhere for the water to go, your organic materials can quickly suffer the consequences. There’s an easy fix, however, simply open it up.
Creators differ on this point, whether or not to naturally aerate your terrarium regardless of the levels of moisture.
Personally, I have terrariums that I’ve never properly aerated yet have survived just fine and are yet to develop any kind of mould growth.
But, I’ve always been cautious of overwatering.
Opening up your terrarium to aerate promotes a free flow of air, allowing harmful chemicals to release and moisture to evaporate.
It’s unusual for mould to develop in an open terrarium, due to the lack of humidity.
If yours is closed, leave it ajar for a day or so, or until it looks like the moisture level has balanced.
Do be aware that some mosses may suffer the consequences, as they prefer a consistently humid environment, and the sudden flux may damage or destroy them
Combine opening your terrarium with the application of hydrogen peroxide on a cotton bud – and you should be on to a winner.
There you have it, 10 ways to beat the living fungi out of your terrariums.
Got any more tips that have worked for you?
Comment below!
If you found this post useful, consider subscribing to our newsletter for more entries like this!
- Joe


Great post! Dealing with terrarium mould can be challenging, but these 10 simple solutions provide effective ways to combat it. From proper ventilation and substrate maintenance to adjusting watering routines and using natural fungicides, there are plenty of methods to keep your terrarium clean and thriving. Understanding these solutions ensures a healthier environment for your plants and a more enjoyable terrarium experience overall.
Hi, my mom gave me my very first terrarium for Mother’s Day. I love it! But I think I’m cursed as far as plants go, only a few have survived my touch 😂 (although, bless her heart, she keeps trying to find something every year that I might keep alive and be able to enjoy ☺️) This terrarium has a glass dome, and cork base, moss, and a small flowering air plant. 🌱 The instructions said to mist it 3 times a week. It’s been 10 days, and I have watered 2-3 times. 🤔 This morning I took the dome off to check it, and the air plant has white fuzz all over it, and fuzz all around the rim of the cork. 😭 I don’t know what to do, because it seems to be all over! (It’s small, only about a 4” circle) I really don’t want to loose it all, I’m really not thrilled about the bug 🐛 fix, and idk if the hydrogen peroxide ALL over will kill it. Can you help me?? I wish I could submit pictures, if there is a way too, just let me know and I’d be happy too. Thanks so much, your site is great! Easy to follow, and great resources. I think I will be getting more, I’m hooked. (That is, if I can figure out how to not kill them in a week 😜)
Hello!! I love your terrariums!!!! I have seen that you use cork, how do you treat it before putting it in the terrarium? I have used cork in my terrariums and they have grown moldy. I would appreciate your help. Many thanks
Leave a comment